Skip to Main Content
Call Us
Login
Menu
Home
Membership
Membership Information
About Us
About Us
Our History
Golf
Course Tour
Scorecard
Pro Shop
Practice
Tournaments & Outings
Racquets
Tennis
Paddle Tennis
Pickleball
Dining
Dining at Wildwood
Events
Weddings & Banquets
Pool
Pool Facility
Contact Us
Club Contacts
Employment
Member Login
< Back
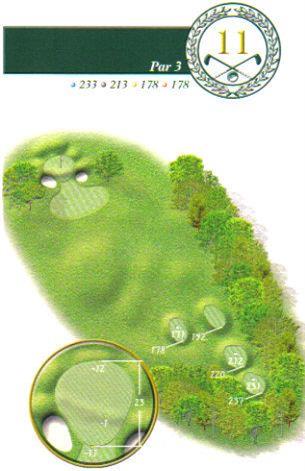
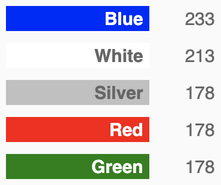
HOLE 11 - PAR 3
Description